 Pin It
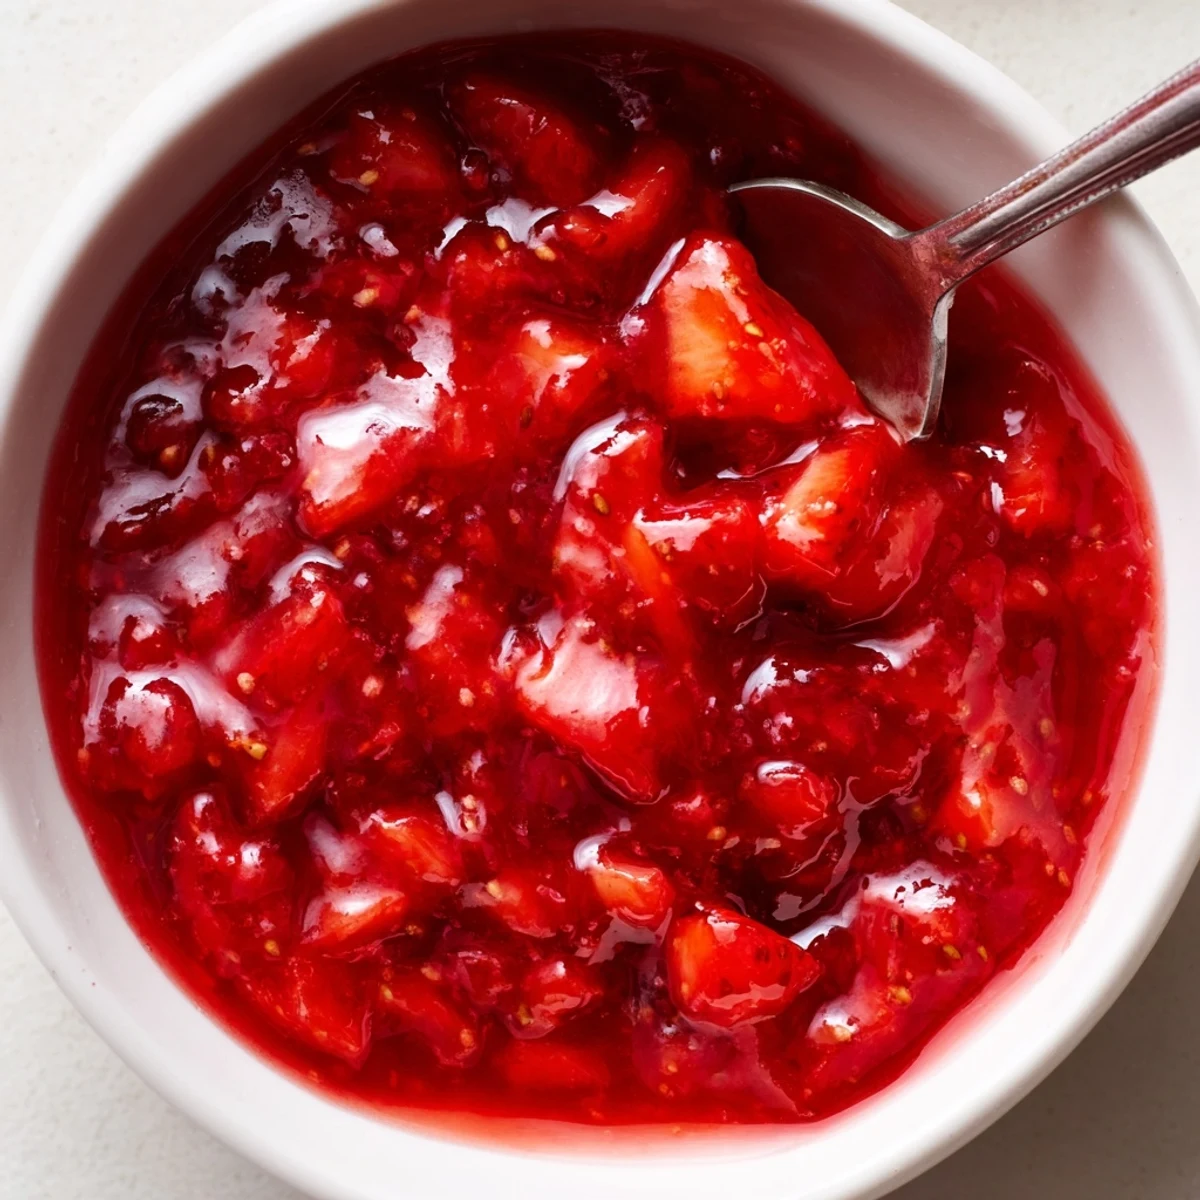
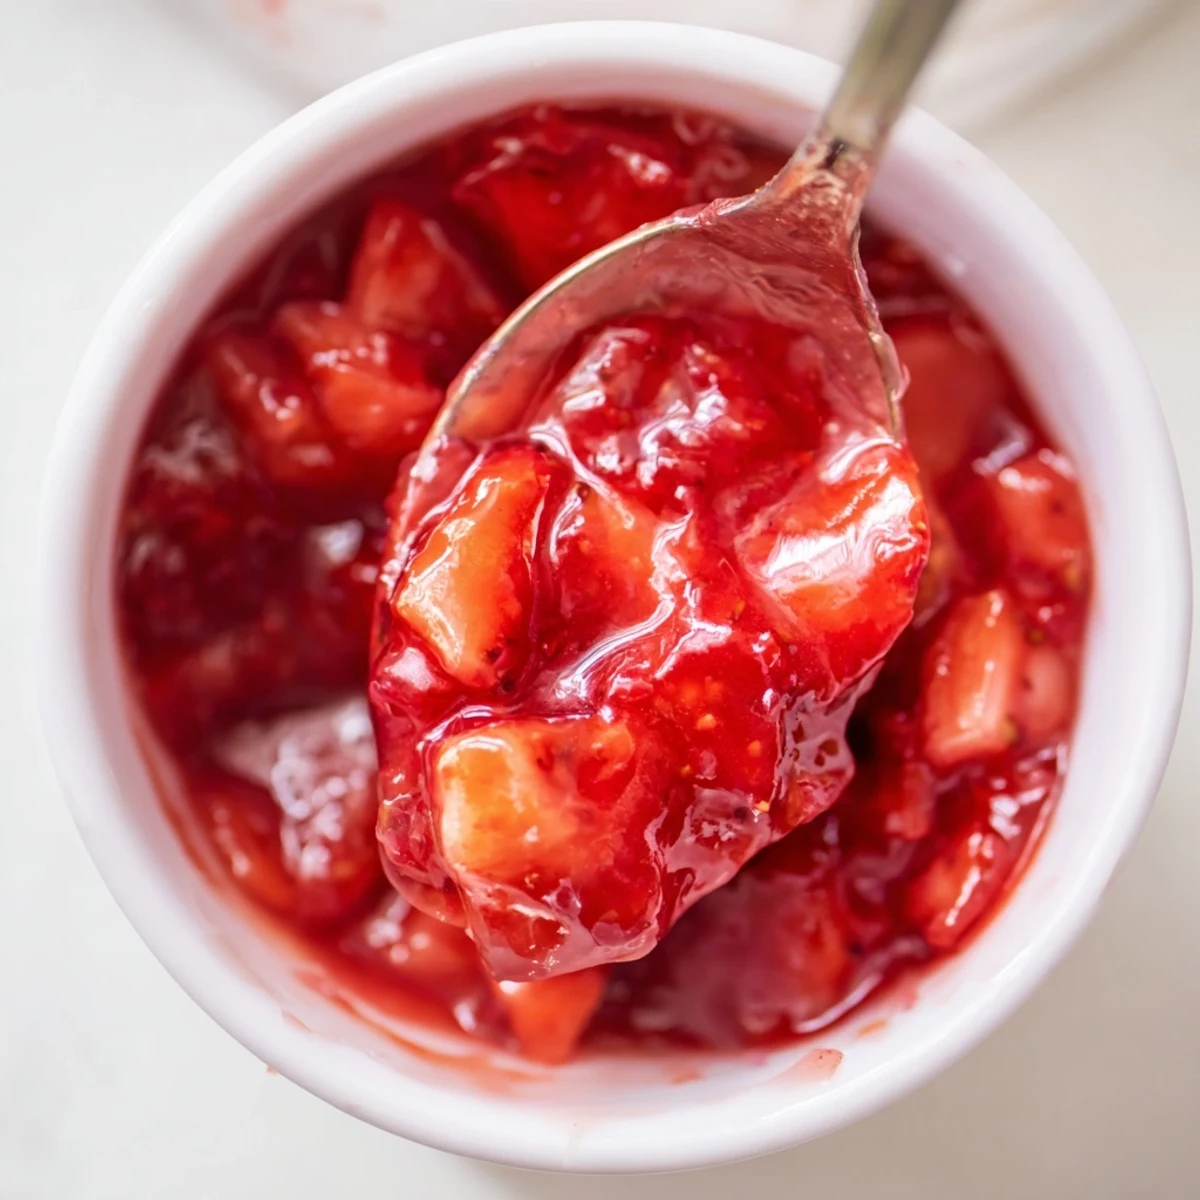
 Make a glossy strawberry filling in about 25 minutes: simmer diced fresh berries with sugar and lemon until juicy (5-7 minutes), whisk in a cornstarch slurry and cook 3-5 minutes until thick and shiny. Stir in vanilla if desired, cool completely to set. Yield about 2 cups - enough for a 9-inch layer. Mash for smoothness, swap berries for variation, and refrigerate up to 5 days.
Steam curling up from a saucepan of macerating strawberries can make any kitchen feel suddenly alive, even on an ordinary afternoon. The scent, fresh and tinged with citrus, always reminds me more of sun-warmed gardens than glossy bakery shelves. This strawberry cake filling snuck into my baking routine after a last-minute cake request left me scrambling—and it turned out that simple, homemade was miles better than any store-bought jar. You’ll soon see why I can’t help looking for excuses to make it again and again.
When my neighbor asked if I could “just add a fruit layer” to her birthday cake, I thought she meant jam. Instead, a few quick minutes in the kitchen and a handful of strawberries turned into something that made the whole table go silent with surprise. There’s something instantly celebratory about a cake slice oozing with ruby-red filling, especially when everyone knows it’s homemade.
Ingredients
- Fresh strawberries: Go for the ripest berries you can find, and don’t worry if they’re a bit soft—those are often the sweetest.
- Granulated sugar: Start with this base, but let your own taste buds be the judge at the end.
- Lemon juice: This little splash brightens up the berry flavor and keeps things balanced.
- Cornstarch: Whisk it until totally smooth to avoid pesky lumps, trust me on that one.
- Water: Just enough to loosen the cornstarch so it blends invisibly.
- Pure vanilla extract (optional): Adds a warm back note if you’re feeling a bit fancy, but leave it out for pure berry flavor.
Instructions
- Combine the berries:
- Toss the diced strawberries, sugar, and lemon juice in a medium saucepan, stirring as their juices start to slick the sides.
- Cook it down:
- Bring the mix to medium heat and stir gently for 5 to 7 minutes, until it smells sweet and the berries look drowsy and soft.
- Prep the thickener:
- In a small bowl, whisk cornstarch and water until it’s milk-smooth, absolutely no clumps allowed.
- Thicken the filling:
- Pour the slurry into your bubbling berries, then stir constantly for another 3 to 5 minutes, watching it go glossy and thick.
- Add final flavor:
- Pull the pan off the heat and stir in vanilla extract if desired; taste and sigh with happiness.
- Cool completely:
- Let the filling stand until room temperature, when it will become even thicker and easy to spread between cake layers.
- Store smart:
- Spoon leftovers into a clean container and keep in the fridge for up to five days, resisting midnight spoonfuls if you can.
 Pin It
 There was one afternoon I made this filling with my niece perched on the counter, scooping warm strawberries onto plain yogurt as a taste test. She declared it better than ice cream, and suddenly it wasn’t just a filling, but a kitchen ritual we both looked forward to.
How to Switch Up the Fruits
Almost any berry can swap in beautifully for strawberries: I’ve thrown in raspberries, blueberries, and even a handful of chopped cherries before. The trick is to keep tasting as you go—different fruits might need a little more or less sugar or an extra splash of lemon. Even frozen berries can work if you let them thaw and drain well so things don’t get watery.
Serving Suggestions You’ll Want to Try
This filling is wildly versatile, making a simple cake feel suddenly special or dressing up cupcakes and even donuts. If you swirl a spoonful into Greek yogurt, layer it in breakfast parfaits, or sandwich it between cookies, you’ll start inventing excuses to use it. I’ve even topped pancakes and oatmeal with a big scoop, and it disappears just as fast.
Shortcuts for Busy Bakers
No one will judge you if you don’t hull every berry perfectly—rustic looks homemade, not messy. Prepping everything before you turn on the stove makes the whole process smooth and mess-proof. And if clean-up is looming, a splash of hot water in the pan right after pouring out the filling saves a world of scrubbing later.
- If you forget the lemon juice, a pinch of salt can perk up the flavor in a pinch.
- I often double the recipe so I have leftovers for sneaky spoonfuls later.
- Chill the filling completely before layering in cakes, or things will get messy.
 Pin It
 May every cake you fill with this recipe carry a bit of your own kitchen magic. Sharing it always feels like an extra-sweet moment, and I hope you love it, too.
Recipe FAQs
- → How do I get a smooth filling?
-
Mash the strawberries with a fork or pulse briefly with an immersion blender before or after cooking. Strain through a fine sieve for an extra-smooth texture.
- → How can I adjust sweetness or tartness?
-
Taste while cooking and add more sugar for sweetness or an extra splash of lemon juice to brighten and increase acidity. Adjust in small increments.
- → What thickener works best?
-
Cornstarch mixed with cold water creates a glossy, jam-like finish. For a clearer set, dissolve thoroughly and cook until the mixture thickens and shines.
- → Can I use frozen strawberries?
-
Yes. Thaw and drain excess liquid before cooking; you may need to reduce longer to achieve the desired thickness, as frozen berries release more juice.
- → How should I store leftovers?
-
Cool completely, transfer to an airtight container, and refrigerate up to 5 days. Reheat gently before use and stir to restore gloss and consistency.
- → What other fruits work well as swaps?
-
Raspberries and blueberries make excellent alternatives. Adjust sugar and cooking time for fruit sweetness and water content to reach the right set.
