 Pin It
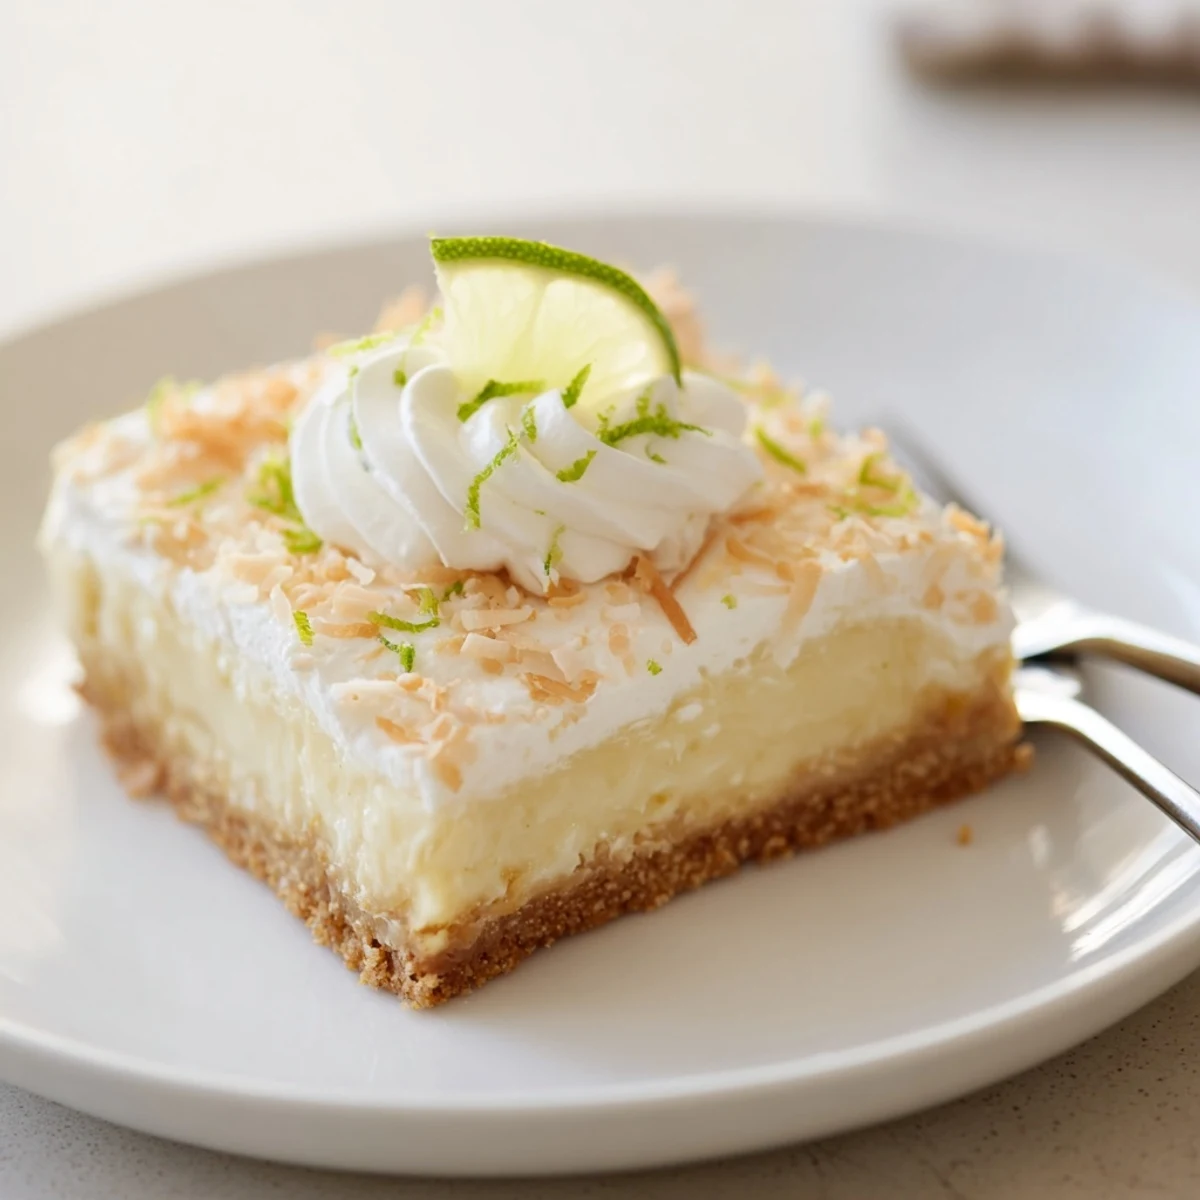
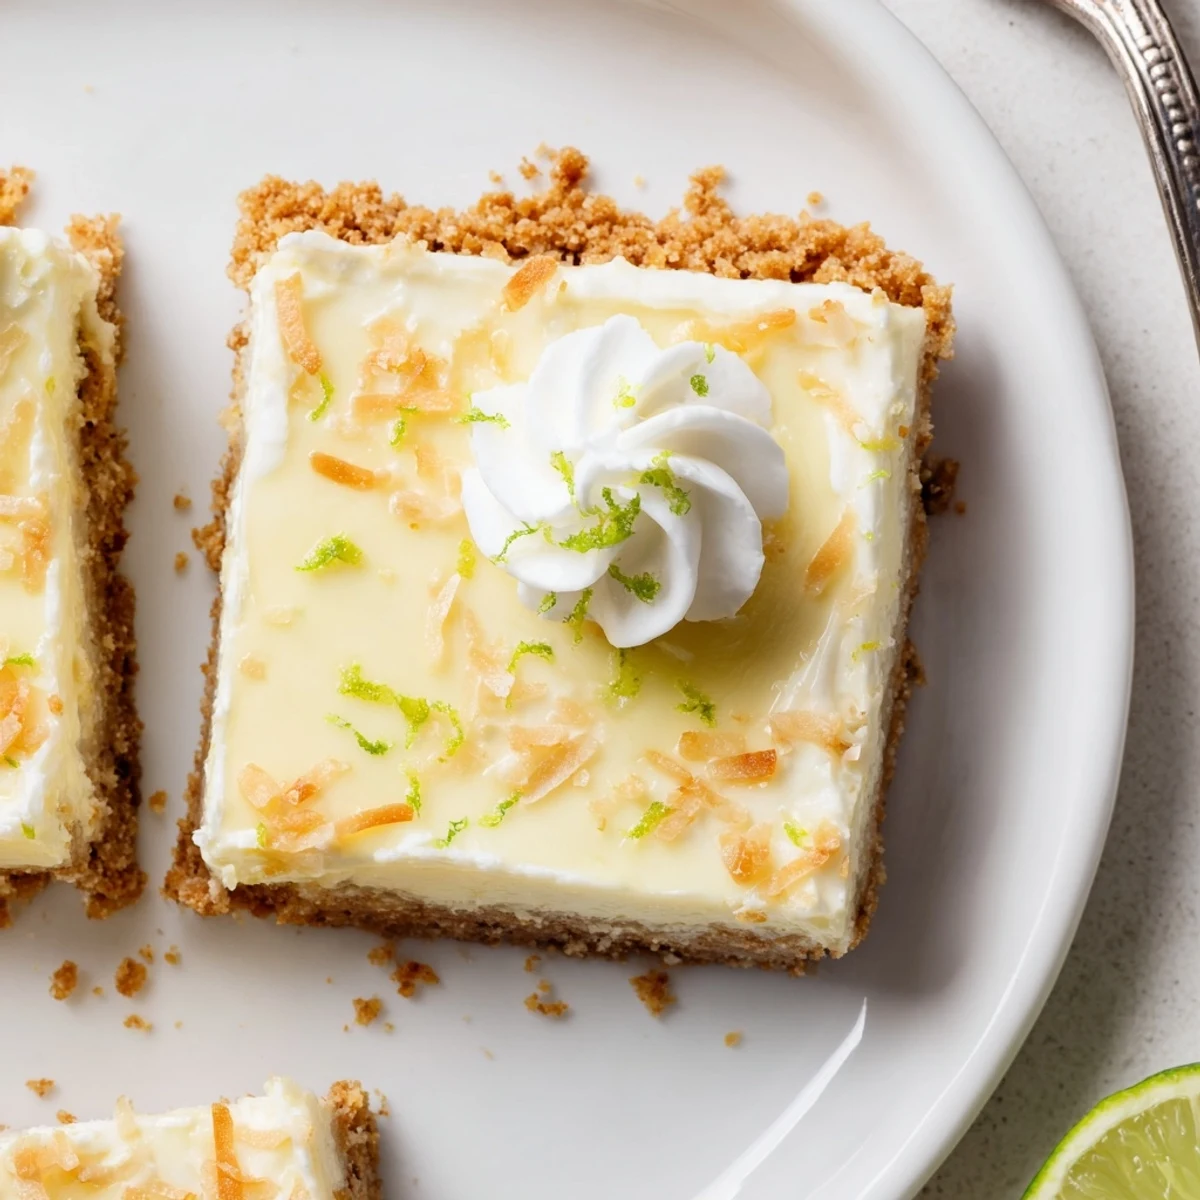
 Bright lime juice and zest are whisked with sweetened condensed milk, egg yolks and coconut cream, poured over a pressed graham and shredded coconut crust, then baked briefly until just set. After cooling, refrigerate until firm and cut into 16 bars. Serve well-chilled with whipped cream, toasted coconut and extra lime zest for a refreshing tropical finish.
Sunlight poured through the kitchen window as I set out the limes, their tangy citrus scent brightening the whole room. A playlist of my favorite mellow songs played in the background, making the chopping, zesting, and mixing feel almost like a mini vacation. Coconut and lime just seem to promise a taste of carefree days, and it was the lingering heat outside that finally prompted me to try something undeniably refreshing. These bars were the result—a little slice of tropical calm whenever I needed it most.
The first time I brought a batch to a backyard BBQ, I caught more than one person sneaking back for seconds. I remember the kids’ faces smeared with whipped cream, their laughter almost as bright as the zest I sprinkled over the bars. That sticky heat and the sound of clinking glasses made these tropical bars the star of the afternoon. Even my friend who claims not to like desserts asked for the recipe before she left.
Ingredients
- Graham cracker crumbs: For a firm, just-sweet-enough base; press them well to prevent crumbling.
- Unsalted butter: Melted butter gives that lush, bakery-style crust—don’t skimp here!
- Sweetened shredded coconut: Tossed into the crust for a hint of chew and extra flavor; toast lightly for deeper coconut taste.
- Granulated sugar: Just enough to sweeten the crust without overpowering the filling.
- Salt: A pinch sharpens all the other flavors; don’t leave it out.
- Sweetened condensed milk: Makes the filling silky smooth and perfectly sweet, no extra sugar needed.
- Egg yolks: Lends luscious thickness to the filling—let them come to room temperature before mixing.
- Lime juice: Always fresh-squeezed for bright, authentic zing; roll limes before cutting to get the most juice.
- Lime zest: Brings out that top-layer citrus aroma—they say the zest holds the soul of the lime.
- Canned coconut cream: Stir well before measuring; the richer, creamier cousin to coconut milk makes the bars decadent.
- All-purpose flour: Just a bit helps set the filling; whisk it thoroughly to prevent lumps.
- Vanilla extract: Adds a subtle warmth that rounds out the citrus and coconut.
- Whipped cream (optional): A cloudlike finish for serving, especially if you want to dress these up.
- Toasted shredded coconut (optional): Sprinkled on top adds toasty crunch and a golden finish—watch carefully so it doesn’t burn.
- Extra lime zest (optional): A final touch for color and fragrance; zest right over the bars before serving for the freshest flavor.
Instructions
- Get set up:
- Line your square pan with parchment, feeling the crinkle of paper beneath your fingertips, and preheat the oven so it’s ready and waiting.
- Build the crust:
- Mix graham crumbs, melted butter, sugar, coconut, and salt by hand until the mixture resembles damp sand; you’ll know it’s just right when it clumps slightly if pressed.
- Press and bake:
- Dump everything into the pan and press down firmly (I use the flat bottom of a measuring cup), then bake until faintly golden—your kitchen will fill with the sweet smell of toasted coconut.
- Mix the filling:
- Whisk together condensed milk, egg yolks, lime juice and zest, coconut cream, flour, and vanilla until it looks glossy and smooth, flecked with specks of green.
- Pour and smooth:
- Pour the filling onto the warm crust and use a spatula to spread it into every corner, smoothing it out for an even bake.
- Bake again:
- Return the pan to the oven and bake until the edges are set but the center still has the barest wiggle; don’t overbake, or you lose the creamy magic.
- Cool and chill:
- Patience time—let the pan cool on the counter, then chill in the fridge until set and sliceable; this is when all the flavors settle and shine.
- Slice and serve:
- Lift the bars out using the parchment handles, slice into neat squares, and crown each with whipped cream, toasted coconut, and bright flecks of lime zest if you like.
 Pin It
 One stormy afternoon, with thunder making the windows rattle, I made these bars for a friend who was feeling homesick for summer. We sat side by side, sharing cloudy squares on a dreary day, both marveling that something so sunny could come from the kitchen while rain pounded outside. With each bite, laughter and conversation brightened the whole room. It was a gentle reminder that simple desserts can lift any mood.
The Right Pan Makes All the Difference
I once tried making these in a larger pan, hoping for thinner bars, but the result was disappointing—stick with the 8-inch square for the ideal creamy-to-crust balance. Lining it with parchment and remembering to leave enough overhang saves so much hassle during removal. Those little details make slicing effortless and keep the bars picture-perfect for sharing.
Perfectly Toasted Coconut Every Time
I learned to toast coconut on a dry skillet instead of in the oven after a few burnt attempts—stand by and stir constantly until you see even, golden browning. The aroma gives you a hint it’s done, almost caramel-like. Toast right before using so it stays crisp atop the whipped cream.
Mixing Up the Flavors (and Making It Your Own)
One spontaneous swap—using key limes instead of regular limes—gave the bars a different, almost floral brightness that everyone noticed. Adding a handful of macadamia nuts to the crust adds crunchy bursts and a buttery depth that travels well with the coconut. These bars are forgiving, so don’t be afraid to adjust the lime or coconut to your taste, just keep the ratios for reliable setting.
- Cut bars with a sharp, damp knife for clean edges.
- The bars keep well covered in the fridge for up to three days.
- Share with someone, even if that someone is yourself on a slow afternoon.
 Pin It
 Whether you serve these after a summer cookout or secretly as a midweek pick-me-up, each tropical bite is a permission slip to pause and savor. I hope these coconut-lime bars brighten your day as much as they’ve sweetened mine.
Recipe FAQs
- → Can I use fresh coconut instead of canned coconut cream?
-
Fresh coconut won't provide the same richness or binding properties as canned coconut cream. If using fresh, blend with a small amount of neutral oil or cream and strain to approach a thicker texture, but canned coconut cream yields the most consistent filling.
- → How do I know when the filling is done baking?
-
The edges should be set and the center slightly wobbly like a firm custard. Overbaking will dry the filling, so remove when the center jiggles gently and it will finish setting as it chills.
- → Can I make the bars gluten-free?
-
Yes. Use gluten-free cookie crumbs for the crust and a gluten-free flour blend or cornstarch in place of the all-purpose flour to stabilize the filling.
- → How long should I chill the bars before slicing?
-
Chill at least 2 hours, though longer (4+ hours or overnight) yields cleaner slices and a firmer, more refreshing texture.
- → What variations work well with the crust?
-
Swap graham crumbs for crushed macadamia cookies or toasted coconut shortbread for extra tropical flavor and crunch. Adding chopped macadamias to the crust also creates a nice contrast.
- → How should I store leftover bars?
-
Keep chilled in an airtight container for up to 4 days. For longer storage, freeze un-topped bars for up to 1 month and thaw in the refrigerator before serving; add toppings just before serving.
