 Pin It
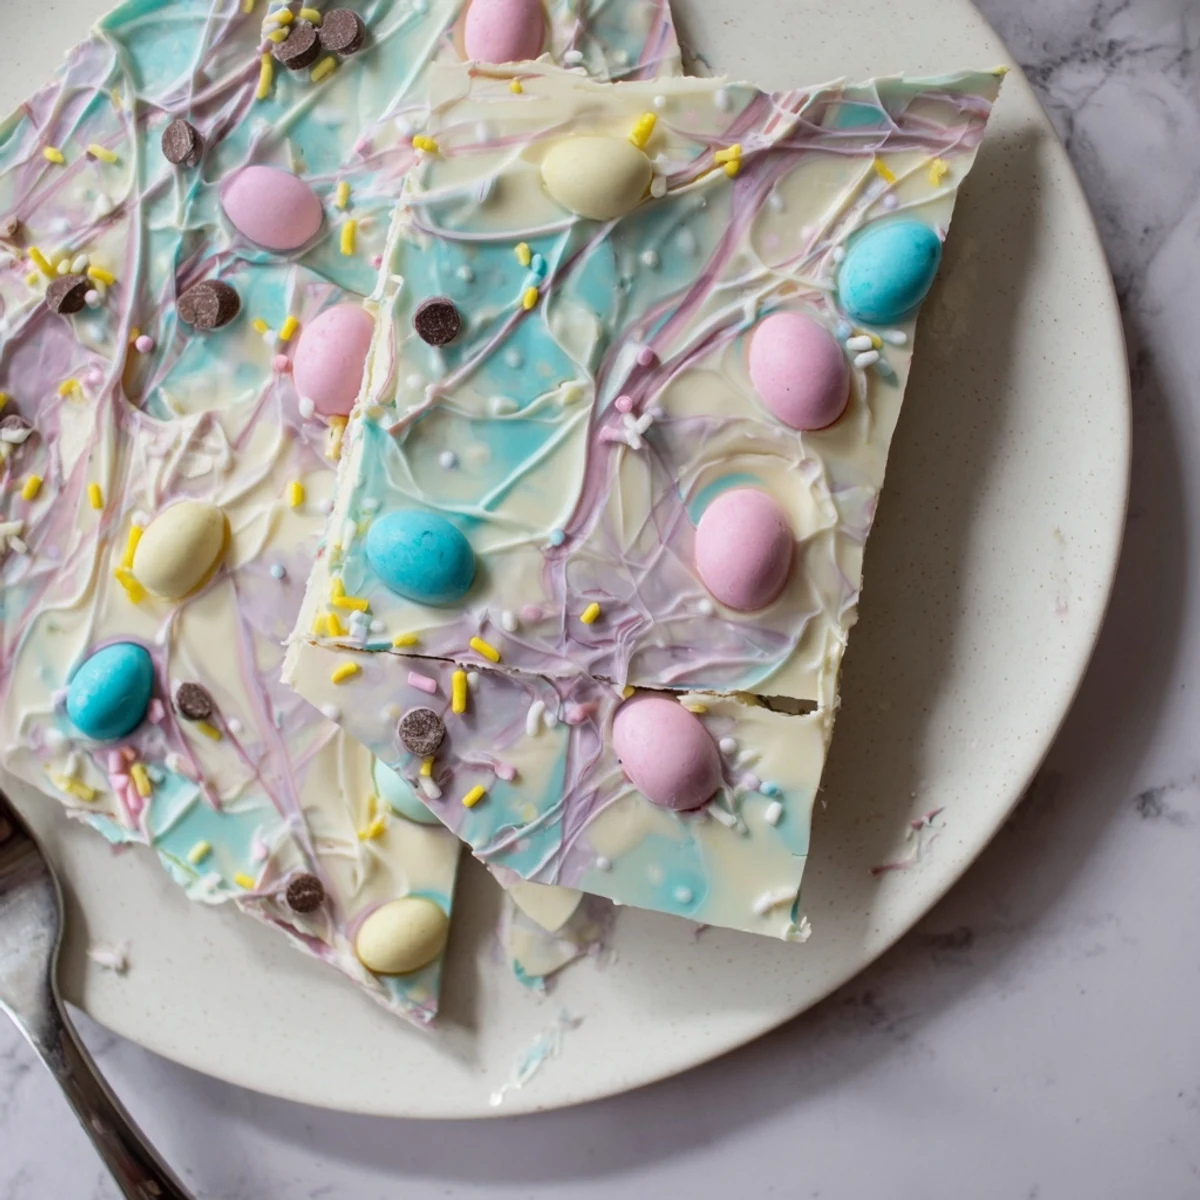
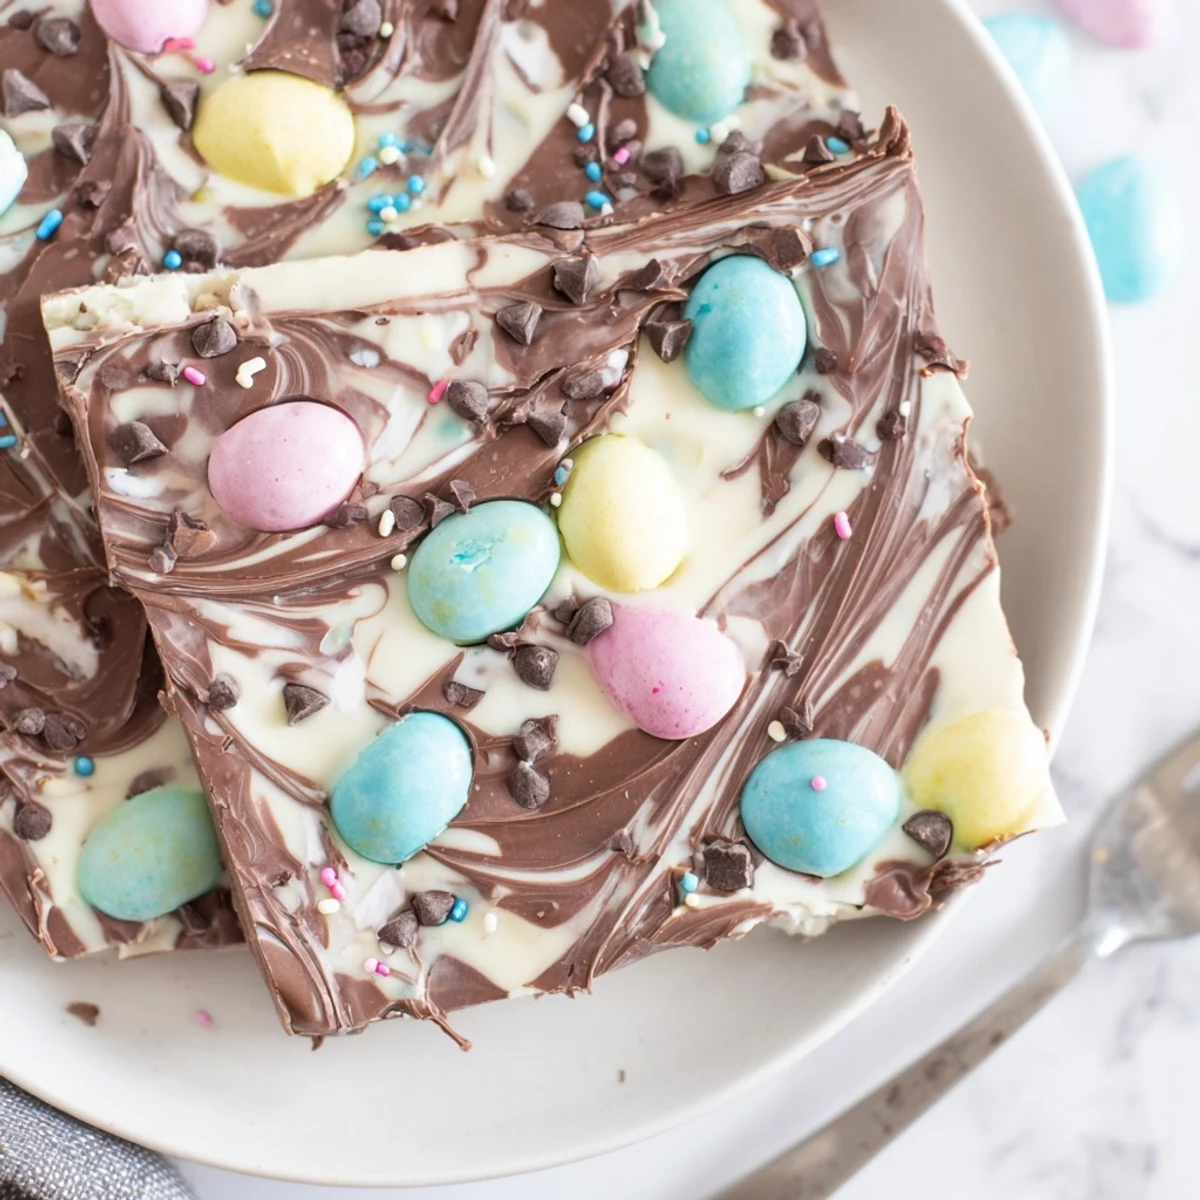
 This no-bake Robin Egg Easter bark layers melted white and milk chocolate, swirled for a marbled look, then is scattered with candy robin eggs, pastel sprinkles and optional mini chips. Melt gently using a double boiler or short microwave bursts, spread to about ¼ inch, top immediately and let set at room temperature or chill until firm. Break into large pieces and store airtight up to a week; swap in vegan chocolate for dairy-free variations.
My kitchen counter looked like a pastel explosion the Sunday before Easter, with sprinkles scattered everywhere and my niece standing on a step stool demanding more robin eggs on the bark. We were supposed to be making something simple for the family potluck, but somehow between the two of us we managed to get chocolate on the ceiling fan. That batch turned out lopsided and ridiculous, and everyone at dinner fought over the ugliest pieces because they had the most candy on them.
My sister walked in right as I was dragging a toothpick through the chocolate and gasped like I was performing surgery, then immediately asked if she could film it for her social media. The video turned out blurry and vertical, but the bark itself was gorgeous enough that nobody cared about the footage.
Ingredients
- White chocolate (340 g): Use good quality white chocolate here because it is the base and cheap chocolate tastes waxy when it sets.
- Semi-sweet or milk chocolate (170 g): This is for drizzling and swirling, so pick whichever you prefer, but milk chocolate gives a creamier contrast.
- Candy coated chocolate robin eggs (150 g): Press these in gently while the chocolate is still wet or they will roll right off when you break the bark later.
- Pastel sprinkles (2 tbsp): These disappear into the chocolate if you add them too late, so have them ready in a small bowl before you start melting anything.
- Mini chocolate chips (1 tbsp, optional): These fill in the gaps between the robin eggs and make the whole thing feel more abundant.
Instructions
- Prepare your workspace:
- Line a baking sheet with parchment paper and clear everything else off the counter because you will need to move quickly once the chocolate is melted.
- Melt the white chocolate:
- Use a double boiler or microwave in short bursts, stirring patiently between each round until the chocolate is completely smooth and glossy.
- Spread the base:
- Pour the melted white chocolate onto the parchment and spread it into a rectangle about a quarter inch thick, working steadily but without rushing.
- Melt and drizzle the dark chocolate:
- Melt the semi-sweet chocolate the same way, then drizzle it over the white layer in thin lines going every which way.
- Create the marble swirl:
- Take a toothpick or skewer and drag it through both chocolates in gentle curves, stopping before you overmix and lose the distinct ribbons of color.
- Add all the toppings:
- Scatter the robin eggs, sprinkles, and mini chips over the surface immediately, pressing the larger candies down gently so they anchor into the chocolate.
- Let it set:
- Leave the bark at room temperature for about forty minutes or pop it in the fridge for fifteen if you are impatient like me, then break it into ragged pieces by hand.
 Pin It
 I brought a tin of this bark to my neighbors birthday party in April and she assumed I had bought it from a local chocolatier until I confessed how easy it was.
Getting the Marble Right
The trick is knowing when to stop swirling, because the line between elegant marble and muddy brown is surprisingly thin. Drag your toothpick through the chocolate no more than six or seven times, lifting it fully between each pass, and resist the urge to keep going even if it looks incomplete.
Making It Your Own
Crushed pretzels add a salty crunch that balances the sweetness beautifully, and toasted coconut makes the whole thing taste like a candy bar from a boutique. You could also swap the robin eggs for whatever seasonal candy is available, because this bark works year round with different toppings.
Storing and Gifting
Keep the bark in an airtight container at room temperature and it stays fresh and snappy for a full week, though honestly it never lasts that long in my house. For gifting, layer pieces between sheets of parchment inside a decorative tin.
- Avoid storing it in the fridge unless your kitchen is genuinely hot, because condensation can dull the finish.
- Wrap individual pieces in cellophane bags tied with ribbon for easy party favors.
- Always double check candy labels for allergens if you are sharing with a crowd.
 Pin It
 Every Easter now my niece asks if we are making the messy bark again, and I always say yes because some traditions are worth the cleanup. The ceiling fan still has a faint chocolate smudge nobody can reach.
Recipe FAQs
- → How should I melt the chocolates without seizing?
-
Melt white and milk chocolate gently over a double boiler, stirring constantly, or use 20–30 second microwave bursts, stirring between each. Avoid steam and water contact to prevent seizing.
- → How do I create the marbled swirl between chocolates?
-
Pour the white chocolate as a base, drizzle the darker chocolate in lines, then drag a toothpick or skewer through both in sweeping motions to create a marbled pattern before toppings go on.
- → What toppings work well with robin egg candies?
-
Pastel sprinkles, mini chocolate chips, crushed pretzels, toasted coconut or chopped nuts add color and texture. Press larger candies gently into the surface so they adhere as the chocolate sets.
- → How long does the bark need to set and how should I store it?
-
Allow the bark to set 30–40 minutes at room temperature or 15–20 minutes chilled. Store broken pieces in an airtight container at room temperature for up to one week, or refrigerate for longer keeping in mind condensation can soften coatings.
- → Can I make a dairy-free version?
-
Yes. Use vegan or dairy-free white and milk-style chocolates and choose dairy-free candy coatings. Check labels for hidden milk ingredients.
- → Why did my chocolate bloom or become dull?
-
Dull or streaky chocolate can result from moisture, overheating, or rapid temperature changes. Gently reheat and stir, or refresh by tempering if a glossy finish is desired.
- → Any tips for easier breaking into pieces?
-
Once set, run a warm knife along desired break lines or lightly tap the underside of the tray. For irregular shards, press firmly with your hands or use a towel-covered rolling pin to crack into pieces.
