 Pin It
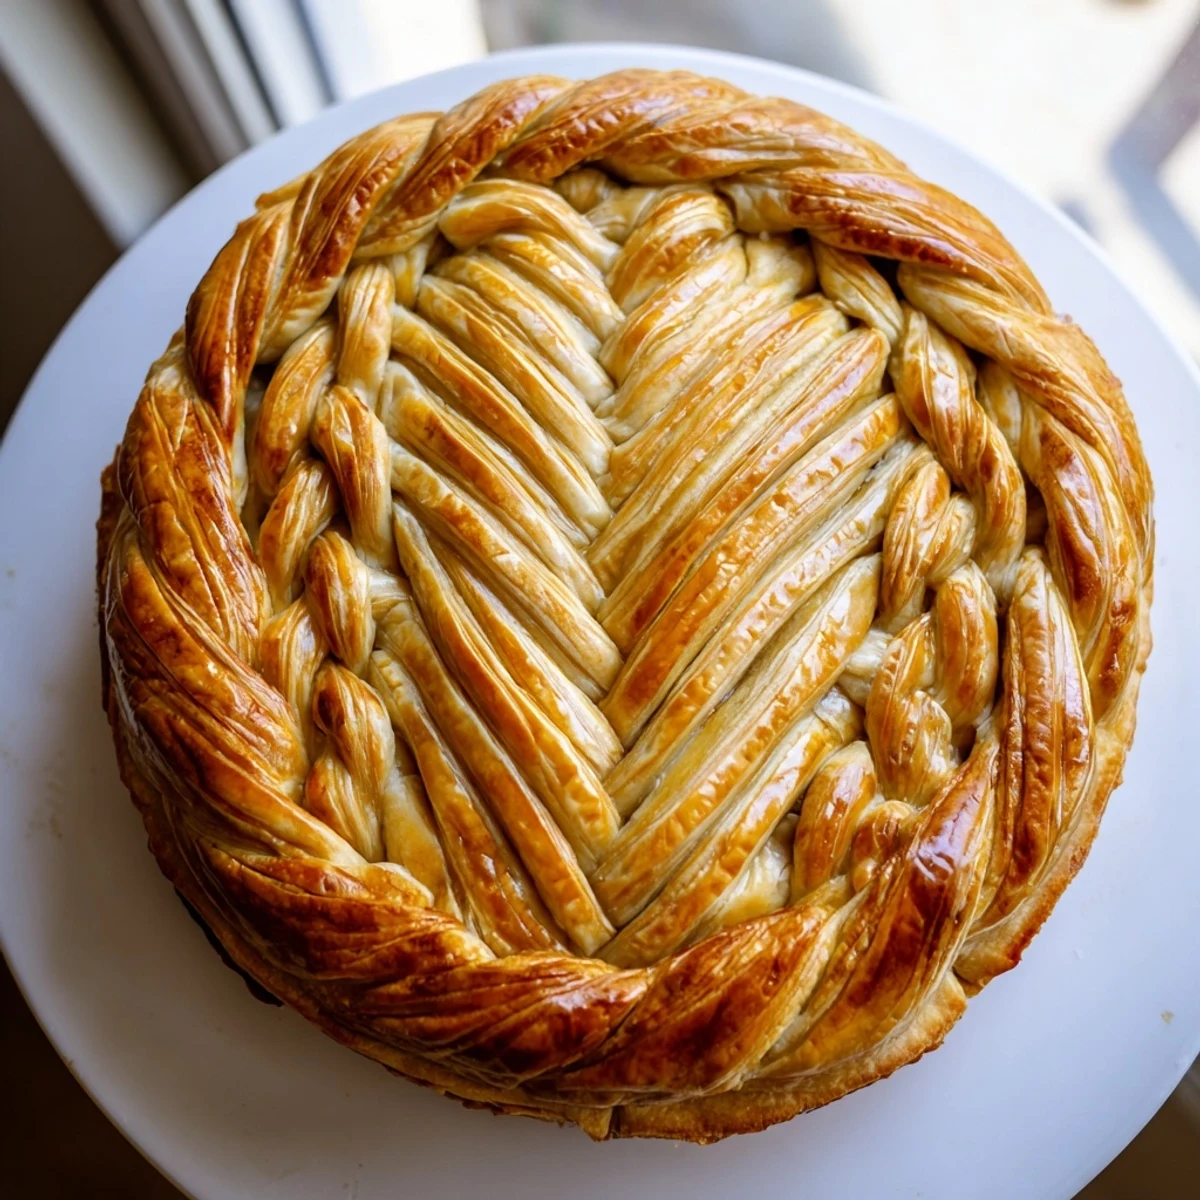
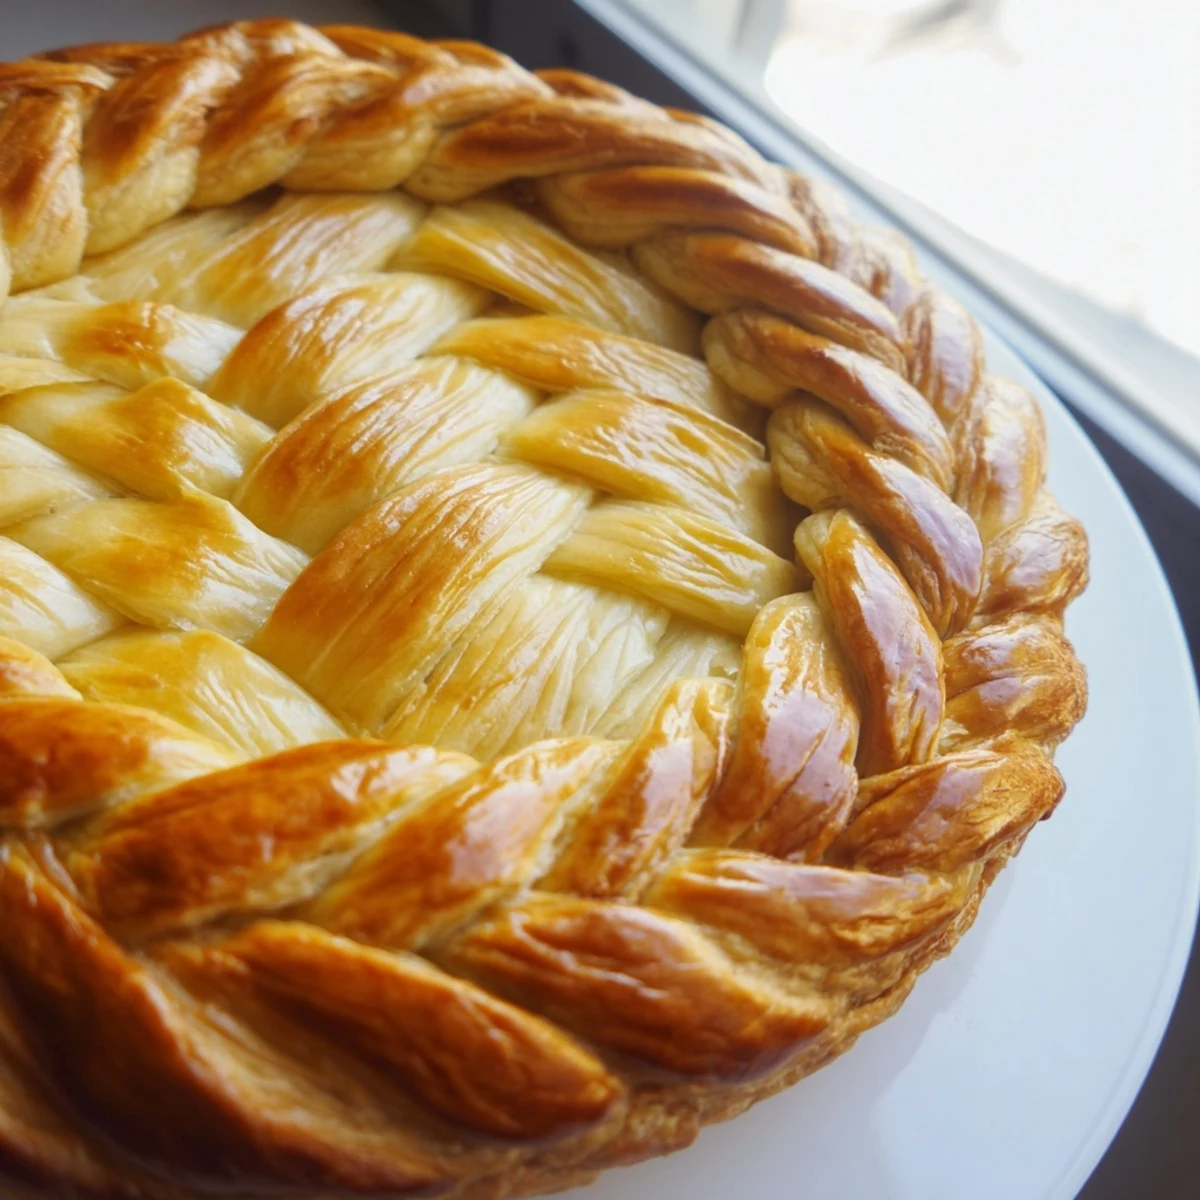
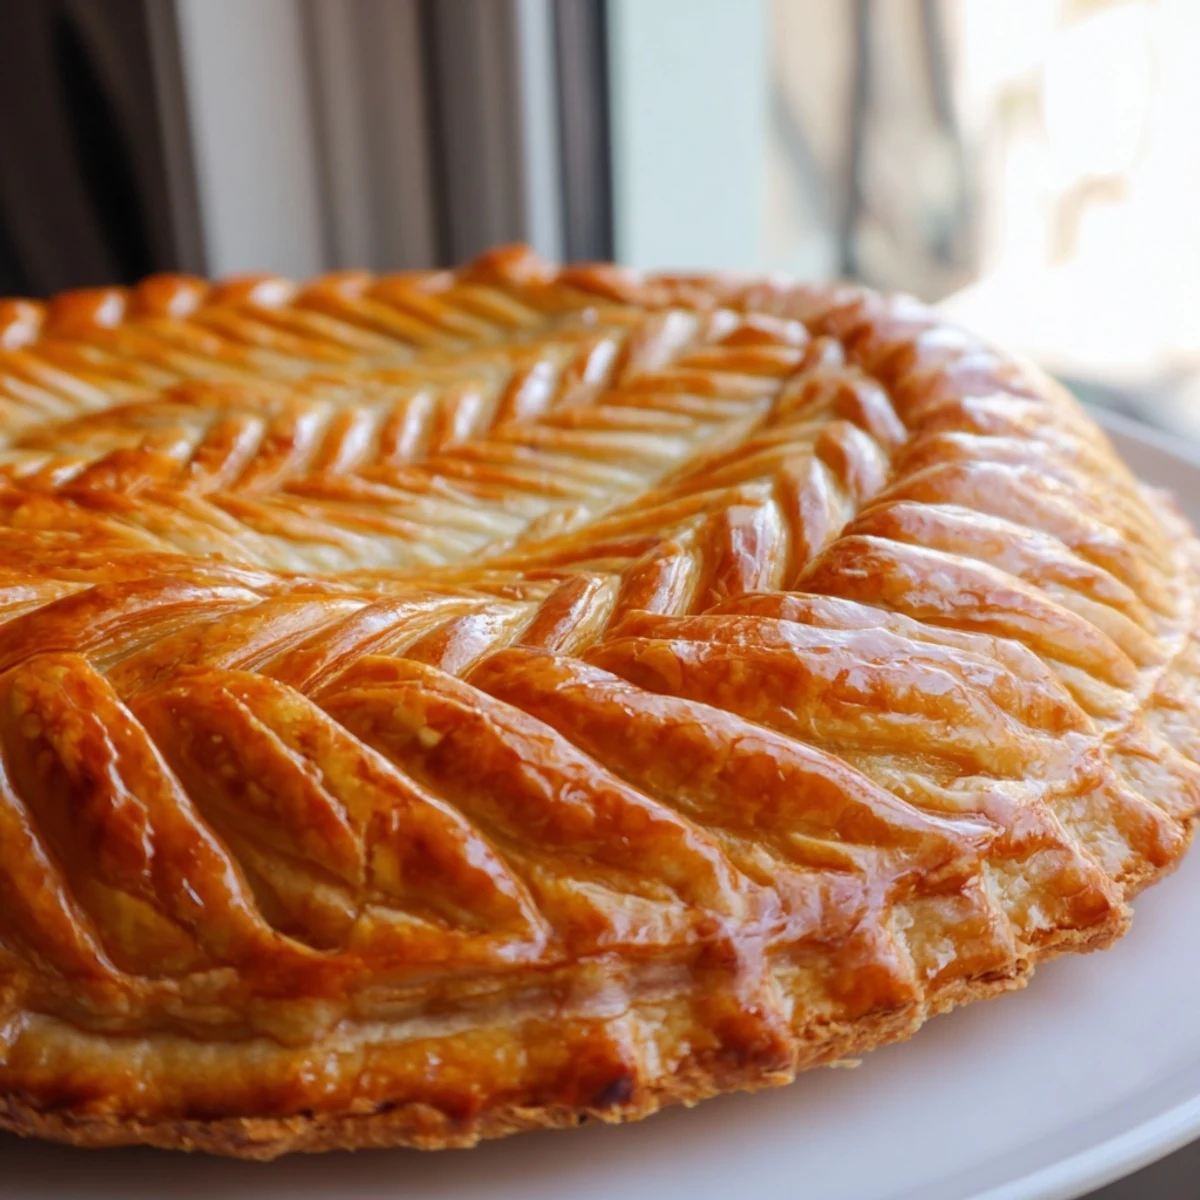
 Master the art of creating an exquisite fishtail braid border for your homemade pies. This decorative crust technique transforms ordinary pastries into stunning centerpieces perfect for holidays, dinner parties, or special occasions. The method involves rolling dough into thin strips, weaving them in a distinctive fishtail pattern, and attaching them to the pie edge before baking. With just 35 minutes of preparation and basic ingredients like flour, butter, and ice water, you can achieve bakery-quality results that will impress everyone at the table.
The first time I attempted a braided pie crust, I was hosting Thanksgiving and feeling overly ambitious. My sister walked into the kitchen to find me literally holding my breath, trying to manipulate six dough strips without breaking them. We both burst out laughing at how seriously I was taking something that's essentially playing with food. That pie became the star of dinner not just because it looked stunning, but because it broke all the tension in the room.
Last summer I made this for a neighborhood potluck, and I swear people took more photos of that cherry pie than they did of each other. Someone asked if I'd secretly gone to culinary school, which is hilarious considering I learned fishtail braiding from a YouTube tutorial at 2 AM. Now it's my go to whenever I need to bring something that says I tried really hard without actually spending three days on it.
Ingredients
- All-purpose flour: This creates the structure for your braids, and keeping it cold is what makes those beautiful flaky layers happen
- Cold unsalted butter: The absolute most important ingredient, those tiny pea-sized pieces melting in the oven create the magic
- Salt: Just enough to enhance flavor without making your dessert taste savory
- Sugar: Optional but lovely for sweet pies, skip it if you are making something savory like a pot pie
- Ice water: Bring it together slowly, some days you need more, some days less, trust your hands
- Egg wash: This is what gives your braids that gorgeous golden shine that makes everyone think you are a professional
Instructions
- Make your pastry dough:
- Whisk flour, salt and sugar in a large bowl, then work in cold butter with your fingers until you see pea-sized bits throughout. Drizzle in ice water while gently tossing, stopping when the dough holds together when squeezed.
- Chill it completely:
- Form dough into two disks, wrap tightly and refrigerate for at least an hour. This resting period is non negotiable, it prevents the gluten from developing too much and keeps your braids from shrinking.
- Roll and cut strips:
- Roll one disk into a rectangle about one eighth inch thick, then cut at least six strips measuring twelve inches long and half an inch wide. A ruler and pizza cutter make this so much easier than eyeballing it.
- Create the fishtail braid:
- Press three strip ends together, start with a regular braid for one stitch, then begin taking the outermost right strip to center, outermost left to center, always pulling from the outside.
- Apply to your pie:
- Brush the pie rim with water, gently lift your braid and position it around the edge, pressing lightly to secure. Brush with beaten egg for that bakery finish.
 Pin It
 My niece now asks specifically for the pretty pie whenever she visits, and she has started helping me make the braids. There is something wonderful about teaching a child that taking extra time to make food beautiful is worth it, that we eat with our eyes first. Those moments in the kitchen together, flour dust on both our noses, are better than any perfectly plated restaurant meal.
Making It Your Own
I have started mixing herbs directly into the dough for savory pies, and let me tell you, rosemary braided crust on a chicken pot pie is absolute magic. You can also weave in thin strips of beet or spinach dough for the most incredible red and green spirals that look almost too pretty to eat.
Working Temperature
Cold dough is your best friend here, and I mean seriously cold. If your kitchen is warm or you have naturally hot hands, work over a chilled surface and keep returning the dough to the refrigerator between strips. I once tried rushing this on a hot summer day and ended up with a braid that looked more like a melted hairdo than pastry.
When To Add The Braid
For fruit pies and anything with a longer bake time, you can add the braid before the pie goes into the oven. If you are blind baking a crust for something like a quiche, chill the assembled braid for fifteen minutes first so it holds its shape in the oven.
- Make extra braided strips and bake them separately for the most delicious crispy snacks
- Practice the fishtail technique with rope or yarn first if the motion feels awkward
- Do not stress about perfection, rustic looking braids have their own charm
 Pin It
 There is a quiet satisfaction in pulling a braided pie out of the oven, knowing you created something that looks like it should be in a magazine. The best part is watching guests debate whether they can actually bring themselves to cut into something so beautiful.
Recipe FAQs
- → What is a fishtail braid pie crust?
-
A fishtail braid pie crust is a decorative border created by weaving thin strips of dough in an intricate fishtail pattern around the edge of a pie. This technique adds visual appeal and creates a professional, bakery-style finish that elevates both sweet and savory pies.
- → How do I keep the braided crust from burning?
-
Brush the braid with egg wash rather than milk, as egg promotes even browning. Monitor the pie during the last 10 minutes of baking and cover the edges with aluminum foil or a pie shield if they brown too quickly. Bake at 375°F and avoid placing the crust too close to the oven's heating elements.
- → Can I make the braided crust ahead of time?
-
Yes, prepare the dough and form the braids up to 24 hours in advance. Wrap the braided strips tightly in plastic wrap and refrigerate. You can also freeze unbaked braids for up to 3 months. Thaw frozen braids in the refrigerator overnight before applying to your pie.
- → What type of pie fillings work best with braided crust?
-
This decorative crust pairs beautifully with fruit fillings like apple, cherry, or berry pies. It also complements savory options such as quiches, chicken pot pies, and vegetable tarts. Choose fillings that don't bubble over excessively during baking to maintain the braid's appearance.
- → How many braids do I need for one pie?
-
For a standard 9-inch pie, you'll need approximately 3-4 braids depending on their length. Each braid should measure about 12 inches long. Roll your dough and cut at least 6 strips (1/2 inch wide each) to create enough braided length to cover the entire perimeter of your pie crust.
- → Can I use store-bought dough for the braided crust?
-
While homemade dough yields the best results, you can use refrigerated pie dough from the grocery store. Let the dough thaw according to package instructions, then roll and cut into strips. Note that store-bought dough may be softer, so chill the strips briefly before braiding for easier handling.
