 Pin It
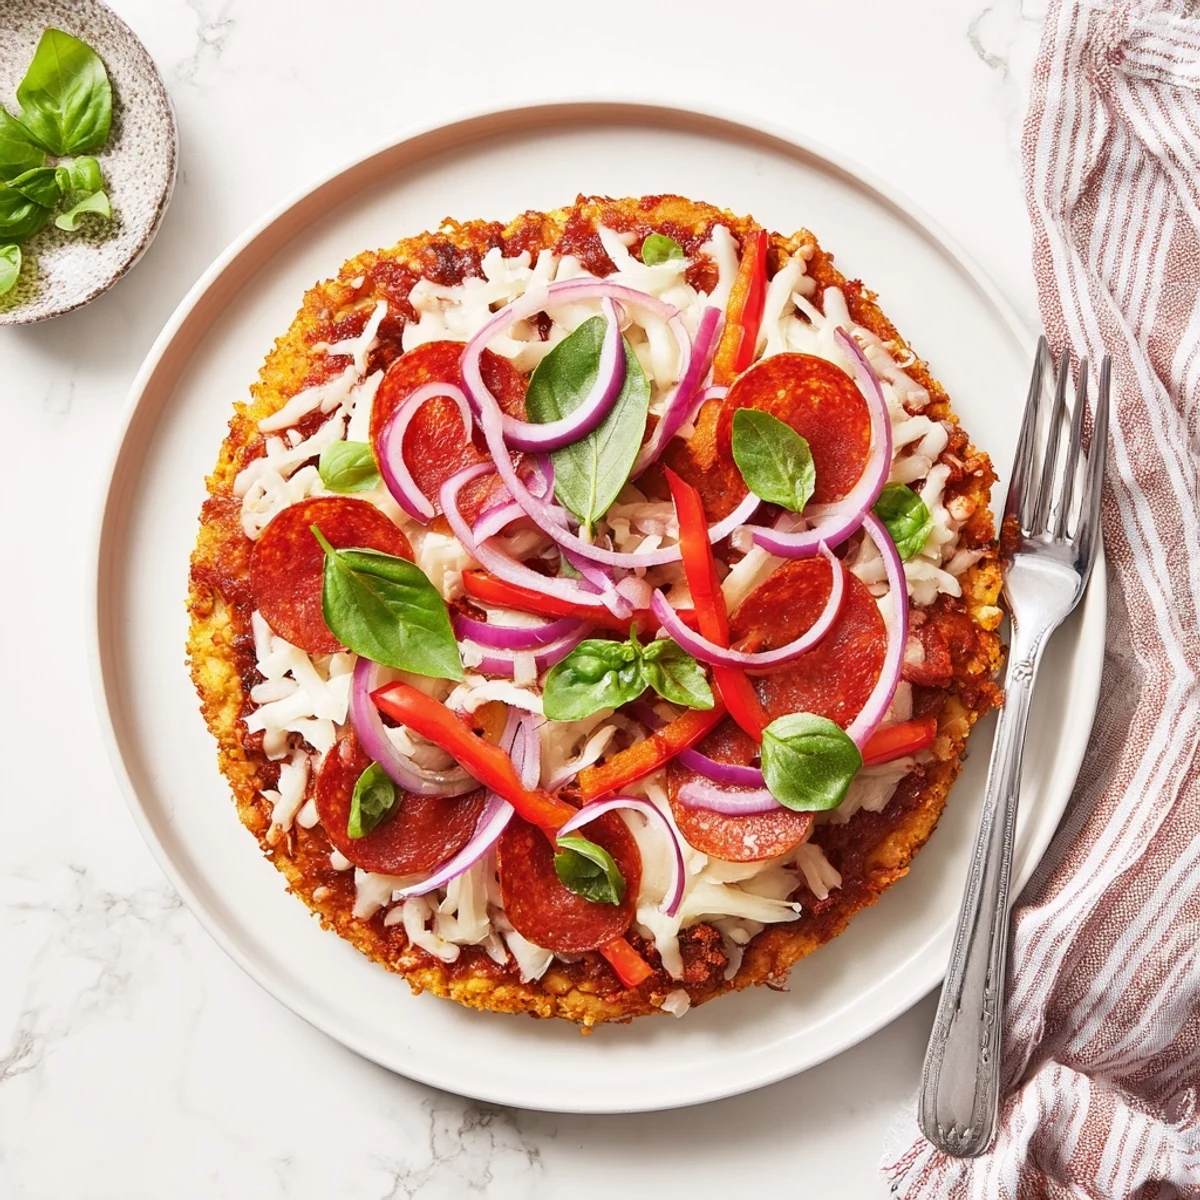
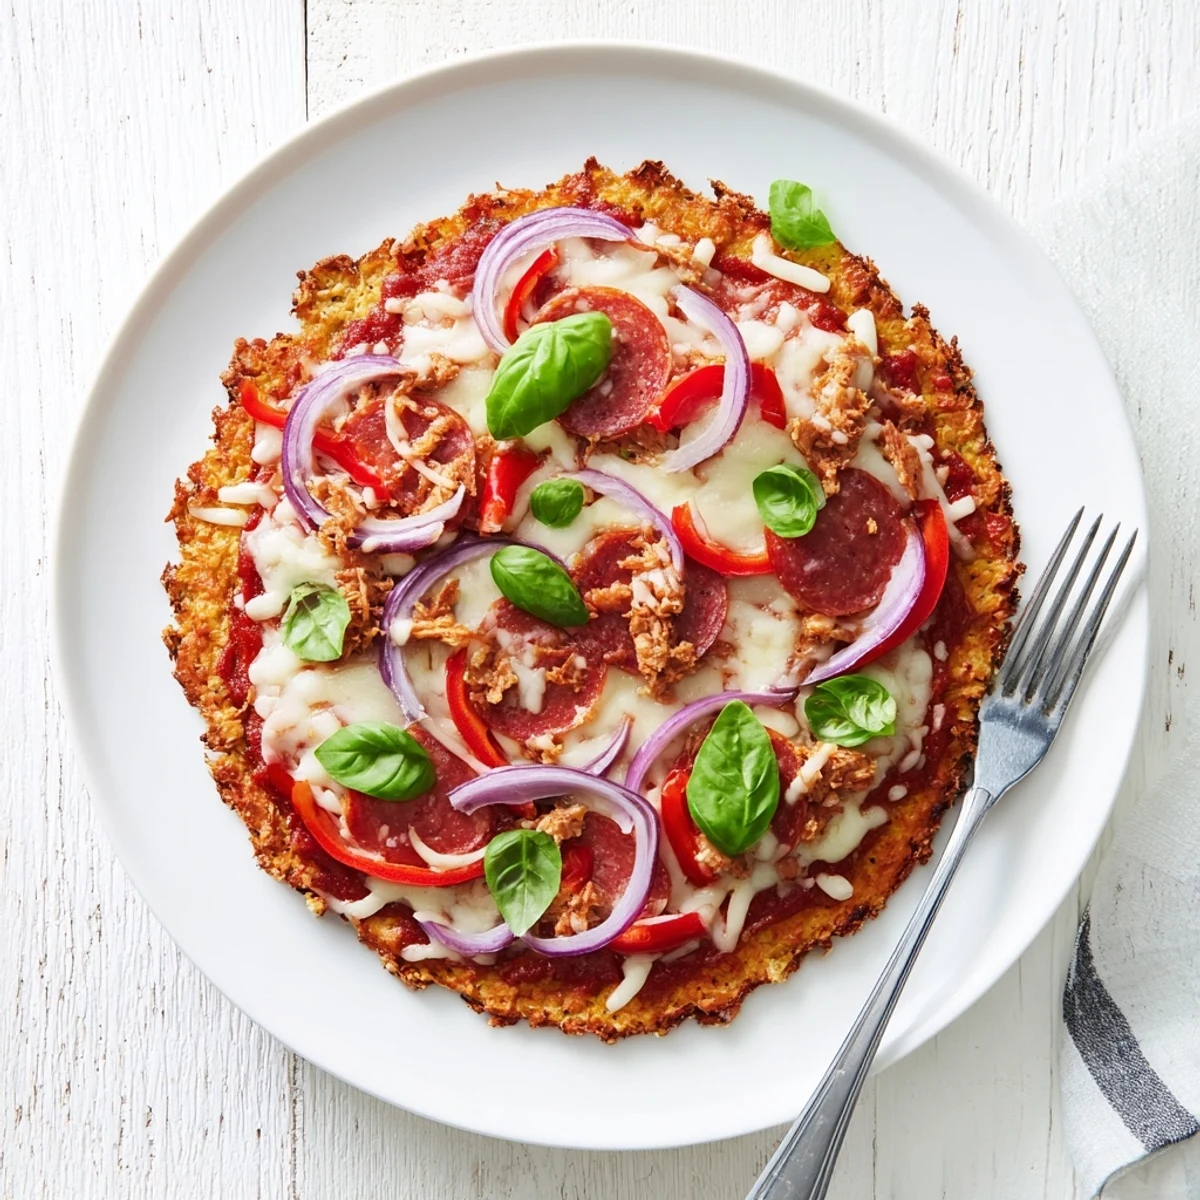
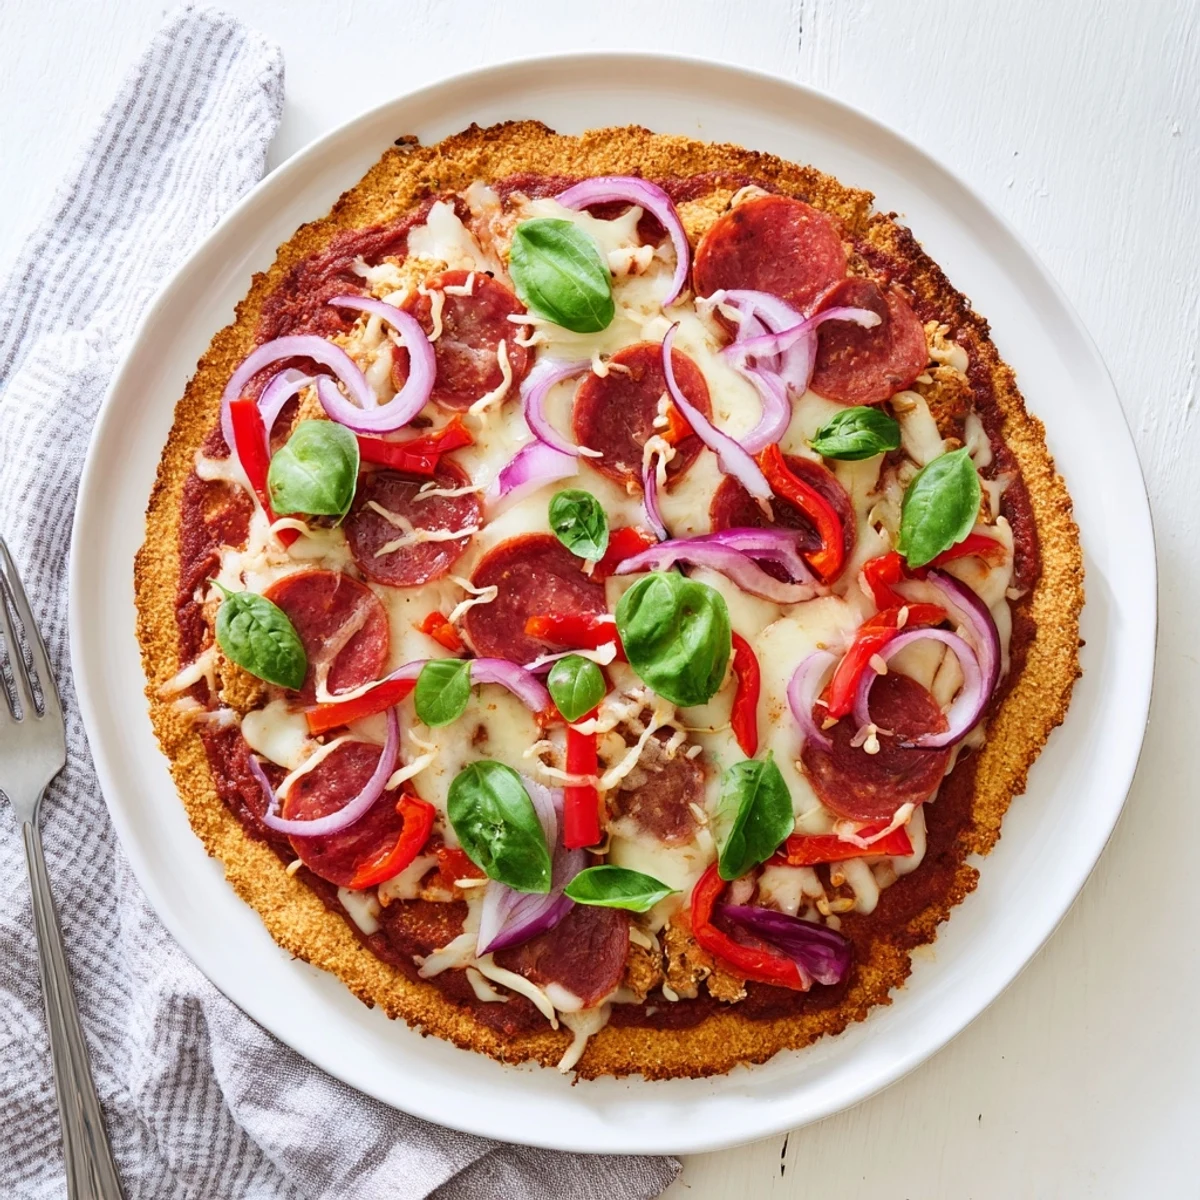
 This innovative creation features a seasoned ground chicken base baked until golden and crispy, then topped with traditional pizza favorites. The crust combines ground chicken with Parmesan, garlic powder, and Italian herbs for maximum flavor. After the initial baking creates a firm foundation, add sugar-free sauce, melted mozzarella, pepperoni, and colorful vegetables. The result delivers 35 grams of protein per serving while keeping carbohydrates at just 6 grams. Perfect for those following gluten-free or ketogenic lifestyles who still crave comfort food classics.
The skepticism on my brother's face when I told him about chicken crust pizza was absolutely priceless. He's a traditionalist who thinks pizza without wheat flour is basically a crime against humanity. After that first bite though, he sheepishly asked for the recipe and now makes it weekly. Sometimes the weirdest ideas end up being the game changers.
My first attempt at chicken crust was a disaster because I made it too thick and it ended up chewy instead of crisp. The kitchen smelled amazing but the texture was completely wrong. Now I know that thinness is everything, and I actually use a ruler to measure the crust thickness. Perfectionists might roll their eyes, but the crispy results speak for themselves.
Ingredients
- Ground chicken: Use dark meat for juiciness or white meat for lighter crust, just avoid any with fillers or added water
- Egg: The crucial binder that holds everything together, room temperature eggs incorporate better
- Grated Parmesan cheese: Adds umami and helps create that satisfying crunch we're after
- Garlic powder: Fresh garlic can burn, so powder disperses flavor evenly throughout the crust
- Italian seasoning: Make your own blend or store bought, just ensure it includes oregano and basil
- Salt: Essential for flavor, but the Parmesan already adds some saltiness so taste as you go
- Black pepper: Freshly cracked makes a noticeable difference in the final flavor profile
- Sugar free pizza sauce: Look for brands without added sugar to keep it truly low carb
- Shredded mozzarella cheese: Pre shredded has anti caking agents, so shred your own for better melting
- Pepperoni: Quality matters here, nitrate free brands taste noticeably better
- Red onion: Thinly sliced so they cook through in the short baking time
- Red bell pepper: Adds sweetness and crunch that balances the salty toppings
- Fresh basil: Add after baking so it stays vibrant and aromatic
Instructions
- Preheat your oven:
- Getting that 220°C temperature right from the start ensures the crust crisps up properly
- Mix the crust base:
- Combine everything thoroughly with clean hands, feeling for any clumps of seasoning that need breaking up
- Shape the crust:
- Press the mixture into your parchment lined tray, keeping it as even as possible for consistent baking
- First bake:
- The crust needs this solo time in the oven to firm up before we add any toppings
- Blot excess moisture:
- This step is crucial, skip it and you'll end up with a soggy bottom situation
- Add your toppings:
- Spread sauce thinly, too much will make the crust soften, then layer on cheese and toppings
- Final bake:
- Watch for that beautiful golden cheese bubble action, that's when you know it's ready
- Rest before slicing:
- The five minute wait feels like torture but lets everything set so slices hold together
 Pin It
 This recipe saved me during my low carb phase when I thought I'd never enjoy pizza night again. Now it's just part of my regular rotation, regardless of what diet I'm following. Sometimes the best recipes come from restrictions we learn to work around.
Making It Ahead
I've discovered that par baking the crust and storing it in the fridge works beautifully for meal prep. Just add toppings and do a quick final bake when you're ready to eat. The texture stays surprisingly good, and it makes weeknight dinners feel almost effortless.
Crust Troubleshooting
If your crust isn't getting crispy enough, try extending the first bake by a few minutes. The chicken should look matte and feel firm to the touch before toppings go on. Don't worry about over baking, chicken can handle the heat better than traditional dough.
Perfecting Your Technique
The most common mistake I see people make is spreading the crust too thick. Remember, it will shrink slightly during baking, so aim for thinner than seems necessary. Use the back of a spoon or an offset spatula for the most even thickness.
- Let your chicken mixture sit for ten minutes before shaping, it helps the proteins bind
- Work quickly once the crust comes out for that moisture blot, heat helps evaporation
- Invest in a good pizza stone if you make this regularly, the bottom crust difference is remarkable
 Pin It
 There's something deeply satisfying about reinventing comfort food into something that loves you back. Enjoy every crispy, cheesy bite of this pizza adventure.
Recipe FAQs
- → Is the chicken crust sturdy enough to hold toppings?
-
Yes, baking the crust for 15 minutes first creates a firm, golden base that easily supports sauce, cheese, and toppings without becoming soggy.
- → Can I make the chicken crust ahead of time?
-
You can prepare and bake the crust ahead, then store it in the refrigerator for up to 2 days. Add toppings and reheat when ready to serve.
- → What other toppings work well with this base?
-
Sautéed mushrooms, olives, bell peppers, spinach, or cooked bacon all complement the savory chicken crust beautifully while keeping it low-carb.
- → Why blot the crust after initial baking?
-
The ground chicken releases some moisture during baking. Blotting removes excess liquid, ensuring your final creation stays crisp and doesn't become soggy.
- → Can I freeze leftovers?
-
Slices freeze well for up to 2 months. Wrap individually in foil and reheat in the oven at 180°C for best texture restoration.
- → Is this suitable for meal prep?
-
Absolutely. The entire dish reheats beautifully in the oven or microwave, making it perfect for portioning into weekday lunches.
